This post is the final part in a series on Custom Elements. See the others about Custom Elements basics and the Shadow DOM.
In the previous posts about custom elements, we made a simple element which contained some text which was set using attributes. However, using attributes can be limiting as we can only pass simple text. Slots allow us to set up our custom element to accept much more than one-line text.
The <slot> element
Let’s continue with our custom element from the previous posts, which was an element to show a message inside a messaging app. Take a look at the Codepen demo to see how it works. In this example, the user’s message is passed as an attribute. This is fine when the message is text, but if we want more flexibility over the message content, this can be awkward using attributes. Instead we can define a <slot>, where any HTML can be inserted.
First, inside our custom-message element’s template, we define a new slot. For this example, let’s change the template so the message content has a slot.
<div class="message-text">
<slot name="message-text"></slot>
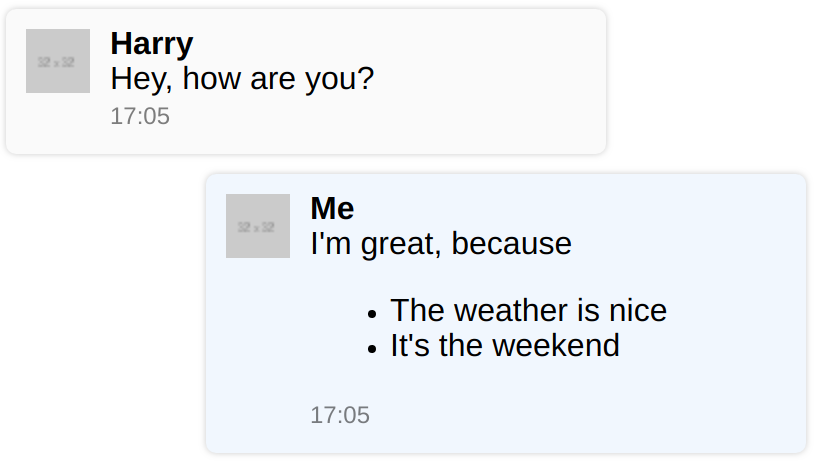
</div>Now when we use a <custom-element>, all we need to do is put the attribute slot="message-text" on our message, and that will replace the slot tag in the template. In this case, let’s replace our simple text message with one that includes a list.
<custom-message
  author="Me"
  profile-photo="https://via.placeholder.com/32x32"
  time="17:05">
  <div slot="message-text">
    I'm great, because
    <ul>
      <li>The weather is nice</li>
      <li>It's the weekend</li>
    </ul>
  </div>
</custom-message></code>
That’s it! The <div> will be put inside the <slot> and work exactly as you would expect.
Take a look at the updated Codepen example to see it in action!